Digital Camo
This tutorial is done by Joseph Phang. You can also find this tutorial at the
message board
|
|
|
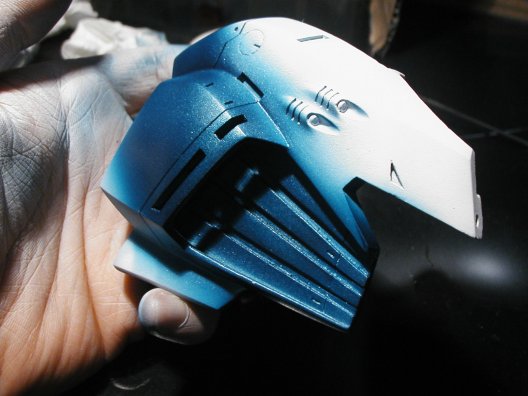
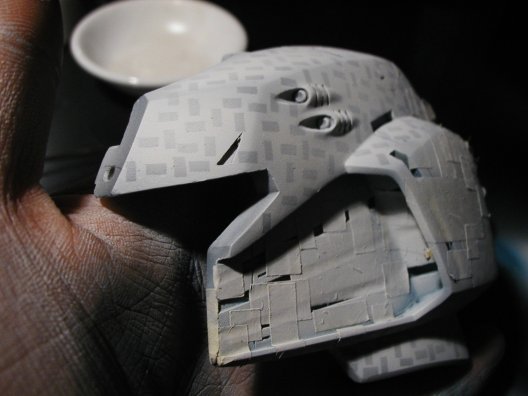
I'm actually using 2 different techniques for the EX-S head, digital camo and I guess you can call the other one digital streak. I first start off by spraying on the metallic blue base coat which I'm using for the digital streak. As you can tell from the pic, the streak will run from the back top of the head at angle, eventully to the chin(which is not done). You'll also notice that i dont wear gloves either
|
|
|
|
Remember to wash your hand afterwards...
|
|
|
|
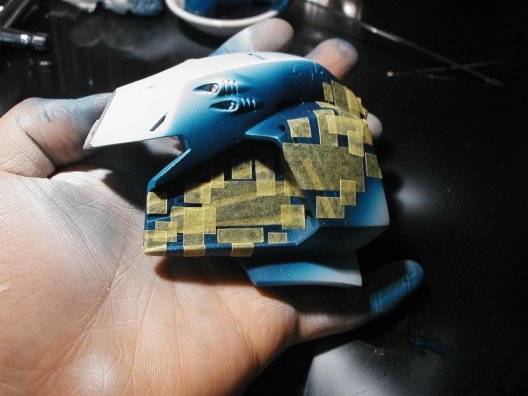
Now heres comes the hard part, masking . All you have to do is cut up a bunch of tiny square masking tape and position it anyway you like. Try not to over do it though and besure to burnish the maskig tape really good. You dont want any bleeding to ruin your hard work
|
|
|
|
It's easier then what it looks...
|
|
|
|
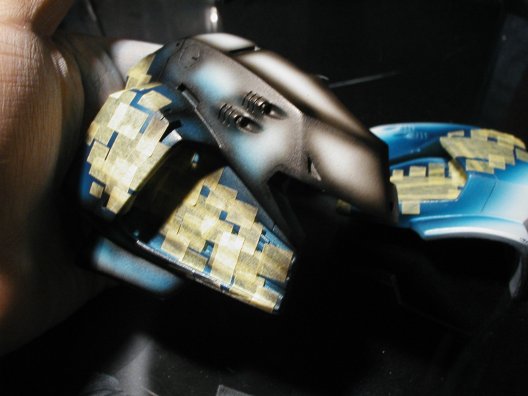
In the next step im just spraying the edges black to setup for the pre-shading,
|
|
|
|
More colours means better looking^^
|
|
|
|
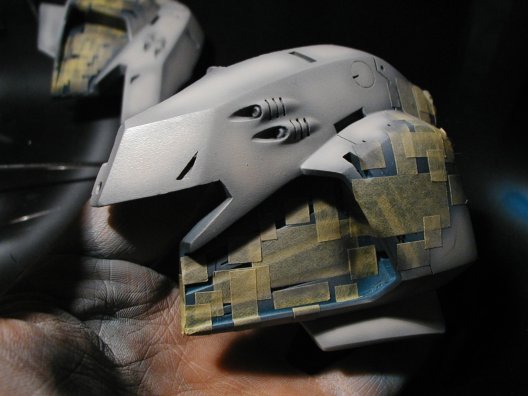
Now its on to the digital camo, I chose a very light grey that I custom mixed myself for the base coat. I hope it turns fine.
|
|

|
|
Now I have both grey and blue paint on my hand^_^;
|
|
|
|
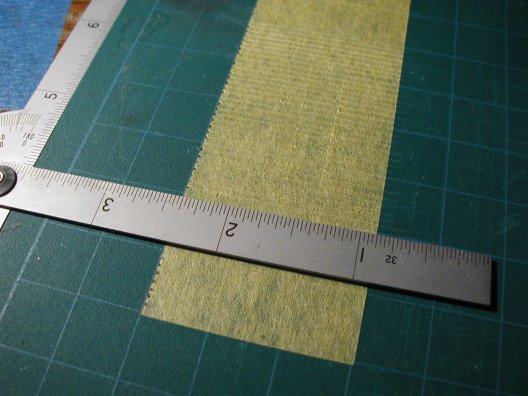
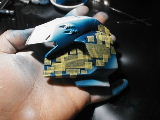
Its time to cut up masking tape again. A lot of people wonder how do you cut so many tiny squares/rectangles. Its actually quite easy, all you need is a self healing cutting matt and a straight edge. I'm using a protractor though, cause it ensures that my cuts are perfectly straight. Mark the edge of the masking tape to how big you want the squares/rectangles to be. Then line it up with the other side and cut it into stripes. Turn it 90 degrees and repeat, then viola hundreds of squares/rectangles. As you can see in my pic, I'll be doing a fine digital camo.
|
|

|
|
Metal ruler is good...
|
|
|
|
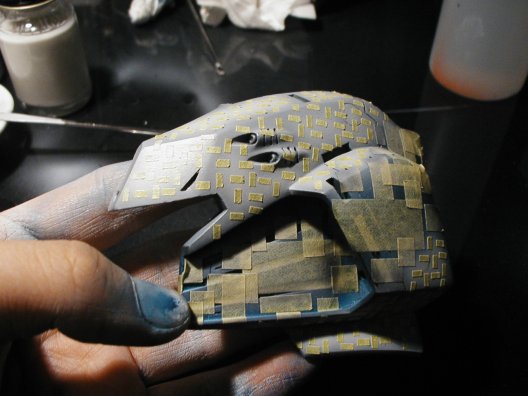
Now this is the really hard part, placing the tiny little squares everywhere. You want to line up all the squares/rectangles in the same direction no matter what the contour of the surface is. I had to reposition the top section to match the side section. I also find it easier to mask it one direction first, be it vertical or horizontal. Then fill in the rest in between in the opposite direction. It actually took me about an hour to this
|
|

|
|
endless masking...
|
|
|
|
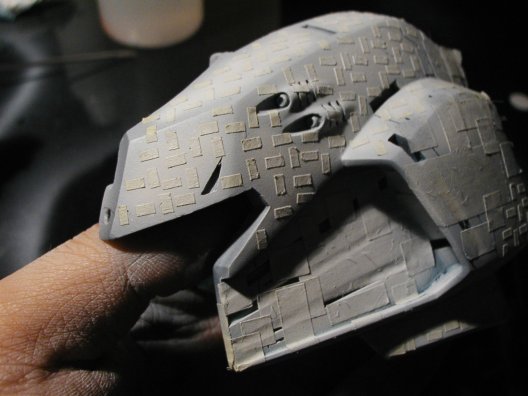
If you haven't fallen asleep yet, its on to painting the highlight to contrast with the digital camo and digital streak base coat. I over spray lightly so that i doesnt cover up the pre-shading I did earlier.
|
|
|
|
Now I really want to see how it looks after those masking tape were removed.
|
|
|
|
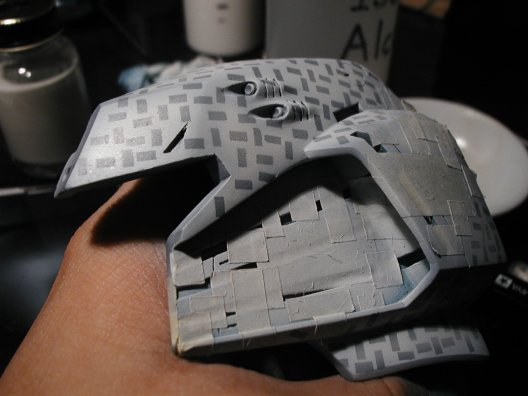
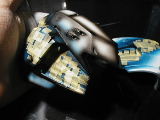
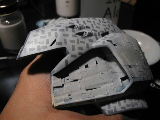
Finally we can unveil the masking tape to see if our hard work was worth it. It may to accpetable to some people but to me the contrast is too harsh, fortunately its fixable.
|
|
|
|
Yes, all the hard work of masking has paid^_^
|
|
|
|
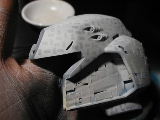
I just over spray lightly again to lighten and blend the dark base coat to the highlight coat. You can do it the other way around too if it turns out the highlight coat is too light. Anyways it looks much better now.
|
|
|
|
Yap, the edge isn't as harsh as before now.
|
|
|
|
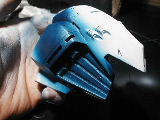
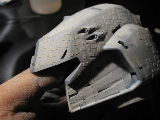
Now that the digital camo is done, we can unveil the digital streak now. It turned out great but you cant see in the pic, the masking tape dulled the finish on the metallic blue. Hopefully a clear coat will rememdy the problem.
|
|

|
|
Does't this looks great^_^
|
|